Install Armory Enterprise in OpenShift using the Armory Operator
This document is intended for users who have purchased the Armory Red Hat Marketplace offering. It will not work if you have not purchased the Armory Operator. Please contact Armory if you’re interested in a Red Hat Marketplace Private Offer.
Overview of the Armory Operator Red Hat Marketplace offering
The is a Kubernetes Operator that makes it easier to install, deploy, and upgrade Armory. You can get the Armory Operator from the Red Hat Marketplace, which is available directly from your OpenShift web console. See the Red Hat Marketplace docs for how to use marketplace.
Installing Armory consists of the following:
Before you begin
-
You have an active Red Hat Marketplace account.
-
You have a Red Hat Marketplace
Cluster Adminrole, which enables you to install Operators from the Red Hat Marketplace. -
You are familiar with installing OpenShift Operators.
-
You have registered your OpenShift cluster with the Red Hat Marketplace.
-
You have a Kubernetes cluster available in OpenShift Container Platform v4.4+.
-
You have configured persistent storage for Armory’s Front50 service.
Front50 requires persistent storage for application and pipeline definitions. There are a number of options for this:
Configure the persistent storage option that works best for your situation.
Install the Armory Operator
You can install the Armory Operator from the Red Hat Marketplace or from the OpenShift web console’s OperatorHub.
- Search for
Armory Operator. - Choose to start a free trial or to purchase the Armory Operator. After you have made your choice, follow the instructions from Red Hat to install the Armory Operator into your cluster.
Deploy Armory
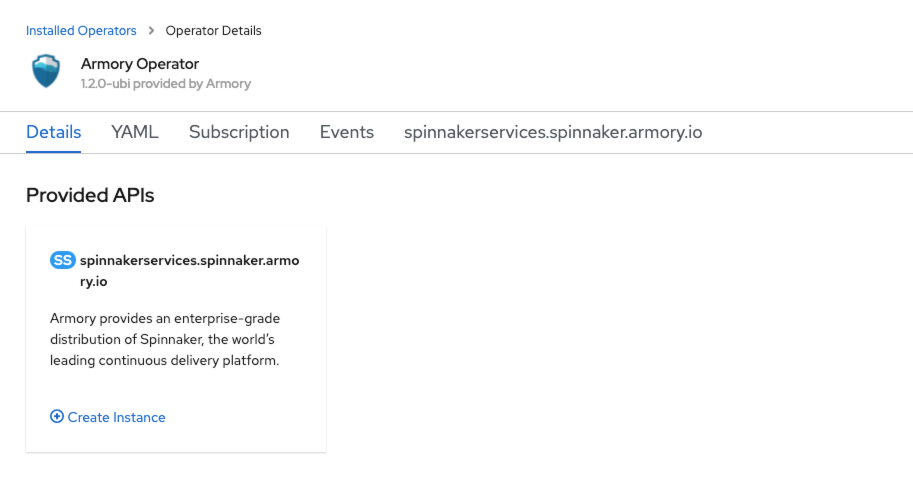
After you have deployed the Armory Operator in your cluster, it appears in the Installed Operators list in the Operators section of the OpenShift web console.

Click on Armory Operator to load details about the Operator. There is one available instance listed under Provided APIs.

Click Create Instance on the spinnakerservices.spinnaker.armory.io tile.
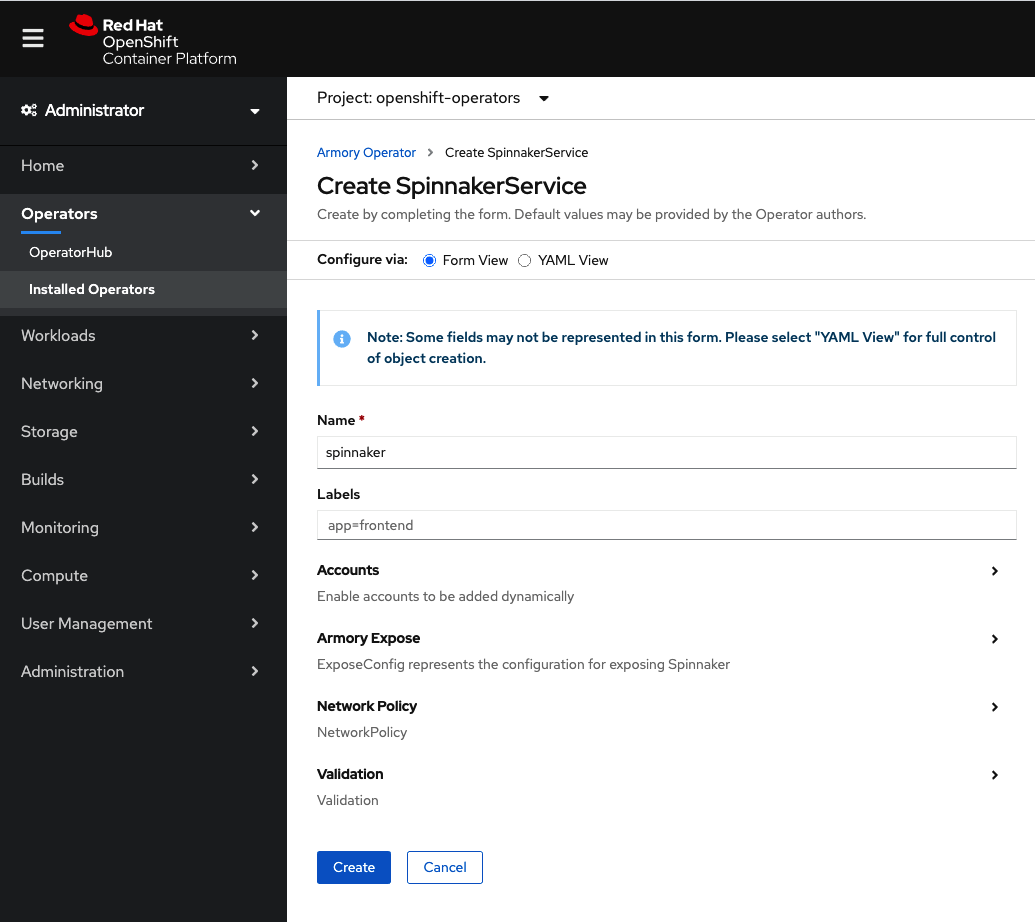
A page opens with a basic console specification of parameters that you need to customize.

Select YAML View to open the YAML editor. The specification you see is abbreviated to only the required parameters:
kind: SpinnakerService
metadata:
  name: spinnaker
spec:
  # spec.spinnakerConfig - This section is how to specify configuration spinnaker
  spinnakerConfig:
    # spec.spinnakerConfig.config - This section contains the contents of a deployment found in a halconfig .deploymentConfigurations[0]
    config:
      version: 2.21.4-ubi   # the version of Spinnaker to be deployed for Openshift
      persistentStorage:
        persistentStoreType: s3
        s3:
          bucket: my-s3-bucket
          rootFolder: front50
Add your configuration using the example SpinnakerService.yml file below as a guide. Consult the
Configure Armory Enterprise Using a Manifest File page for detailed explanations of each config section. Be sure to configure the spec.spinnakerConfig.config.persistentStorage section based on the persistent storage option you created for your Armory instance. See the
Persistent Storage Config page for details.
Show complete SpinnakerService.yml file
Spacing is very important in YAML files. Make sure that the spacing is correct, and that here are no tabs instead of spaces. Incorrect spacing or tabs cause errors when you install Armory.
Click Create after you are satisfied with your edits to the specification.
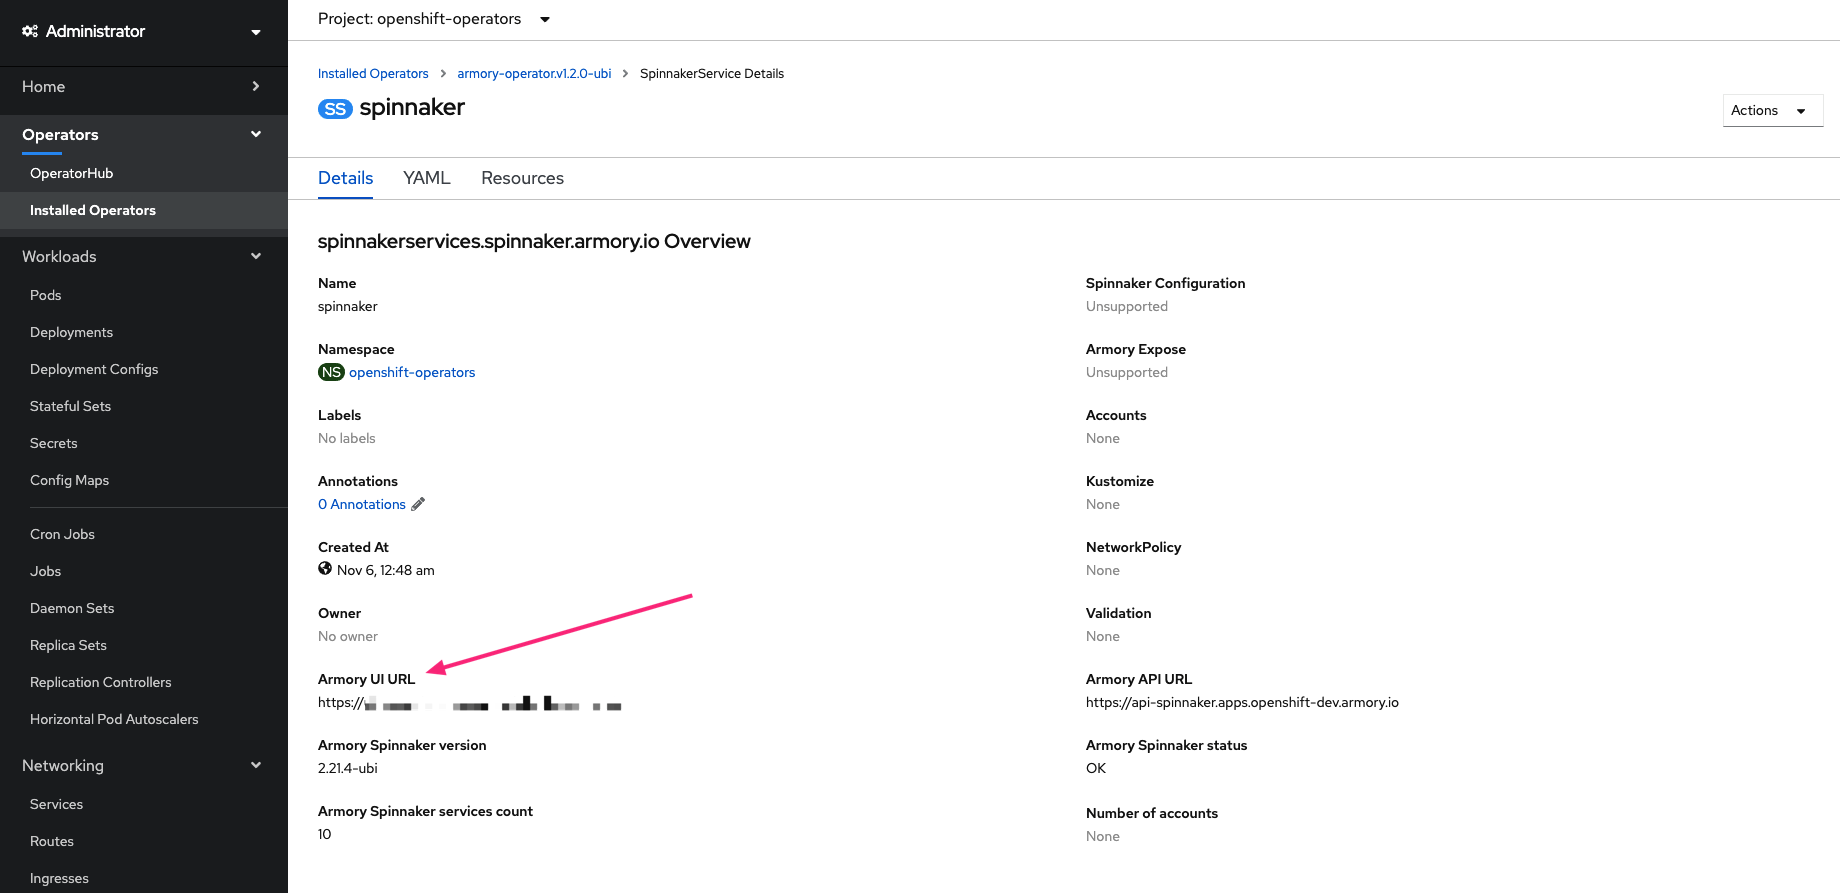
If everything is configured properly, the Armory Operator sees the SpinnakerService custom resource and starts creating Kubernetes Deployments, ServiceAccounts, and Secrets. You can monitor this on the spinnakerservices.spinnaker.armory.io tab:

Expose Armory
Once your Armory instance is running, you need to configure it to be accessible. There are two main parts to this:
- Expose the
spin-deckandspin-gateservices so that they can be reached by your end users and client services. - Configure Armory to know about its exposed endpoints.
Given a domain name or IP address such as spinnaker.domain.com or 55.55.55.55, you should be able to:
- Reach the
spin-deckservice at the root of the domain (http://spinnaker.domain.comorhttp://55.55.55.55) - Reach the
spin-gateservice at the root of the domain (http://spinnaker.domain.com/api/v1orhttp://55.55.55.55/api/v1)
You can use either http or https, as long as you use the same for both.
Create a Route for spin-deck and spin-gate
Determine a DNS name that you can use for Armory within your OpenShift cluster.
Then, create an Openshift Route (Networking -> Routes) to expose spin-deck and another to expose spin-gate.
For spin-deck, use the following content to create your route, replacing metadata.namespace and spec.host with your values:
kind: Route
apiVersion: route.openshift.io/v1
metadata:
  name: ui-spinnaker
  namespace: <your-project-name>
spec:
  host: <ui-spinnaker.apps.my-cluster.company.io>
  to:
    kind: Service
    name: spin-deck
    weight: 100
  port:
    targetPort: deck-tcp
  tls:
    termination: edge
    insecureEdgeTerminationPolicy: Allow
  wildcardPolicy: None
For spin-gate, use the following content to create your route, replacing metadata.namespace and spec.host with your values:
kind: Route
apiVersion: route.openshift.io/v1
metadata:
  name: api-spinnaker
  namespace: <your-project-name>
spec:
  host: <api-spinnaker.apps.my-cluster.company.io>
  to:
    kind: Service
    name: spin-gate
    weight: 100
  port:
    targetPort: gate-tcp
  tls:
    termination: edge
    insecureEdgeTerminationPolicy: Allow
  wildcardPolicy: None
Configure Armory to be aware of its endpoints
Go to the Installed Operators page and select spinnakerservices.spinnaker.armory.io to access the details of your deployed Armory instance.

Select the spinnaker instance you created earlier.

This opens the page with details of your installation. Select Edit SpinnakerService from the Actions drop-down menu.

Add or update the spec.spinnakerConfig.config.security section, replacing security.uiSecurity.overrideBaseUrl and security.apiSecurity.overrideBaseUrl with your endpoints. Make sure to specify http or https according to your environment
spec:
  spinnakerConfig:
    config:
      # ... more configuration
      security:
        uiSecurity:
          overrideBaseUrl: http://ui-spinnaker.apps.my-cluster.company.io        # Replace this with the IP address or DNS that points to our nginx ingress instance
        apiSecurity:
          overrideBaseUrl: http://api-spinnaker.apps.my-cluster.company.io  # Replace this with the IP address or DNS that points to our nginx ingress instance
      # ... more configuration
Save to apply the changes.
Access your Armory instance
The Armory URL is the spec.host value you configured in your spin-deck route. You can find the URL on the details page for your installation.

What’s next
Now that Armory is running, here are potential next steps:
- Configure certificates to secure your cluster (see this section for notes on this)
- Configure authentication/authorization (see the Open Source Spinnaker documentation)
- Add external Kubernetes accounts to deploy applications to (see Creating and Adding a Kubernetes Account to Spinnaker (Deployment Target))
- Add AWS accounts to deploy applications to (see the Open Source Spinnaker documentation)
Feedback
Was this page helpful?
Thank you for letting us know!
Sorry to hear that. Please tell us how we can improve.
Last modified June 24, 2021: (5853796)